To create a dispersion/splatter effect on your subject, we'll be using a number of different techniques and tools, some of these include the liquify tool, layer masks and the use of custom brushes.
Step 1 -
In my first step I'm going to assume you already have a picture of someone or something ready, make sure the picture is behind a white background though, or you're going to have a hard time cutting it out.
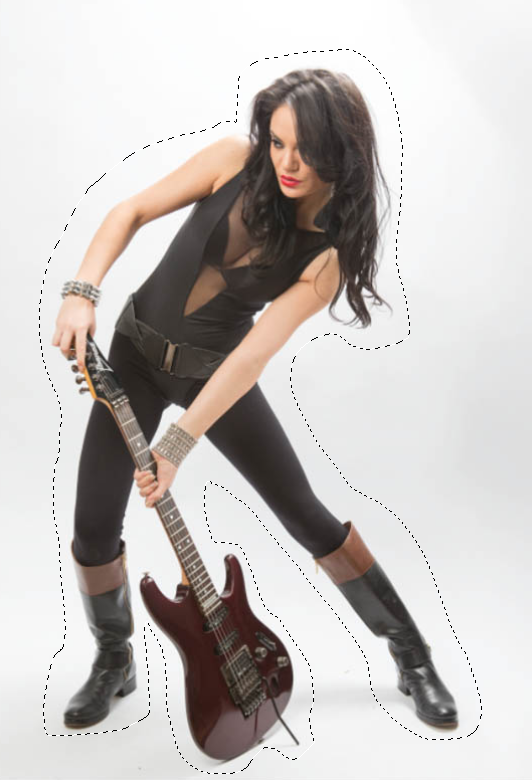
Paste the image into a blank canvas or open it with photoshop. Once this is done, use the lasso tool to cut out the image, just simply go around the subject in your photograph like shown here. Or you can use the magic wand tool to do this but make sure you alter and play with the tolerance depending on the resolution of the image and if the image has a white background. Also make sure that "Contiguous" along the top bar when your wand tool is active, is ticked.
Step 2 -
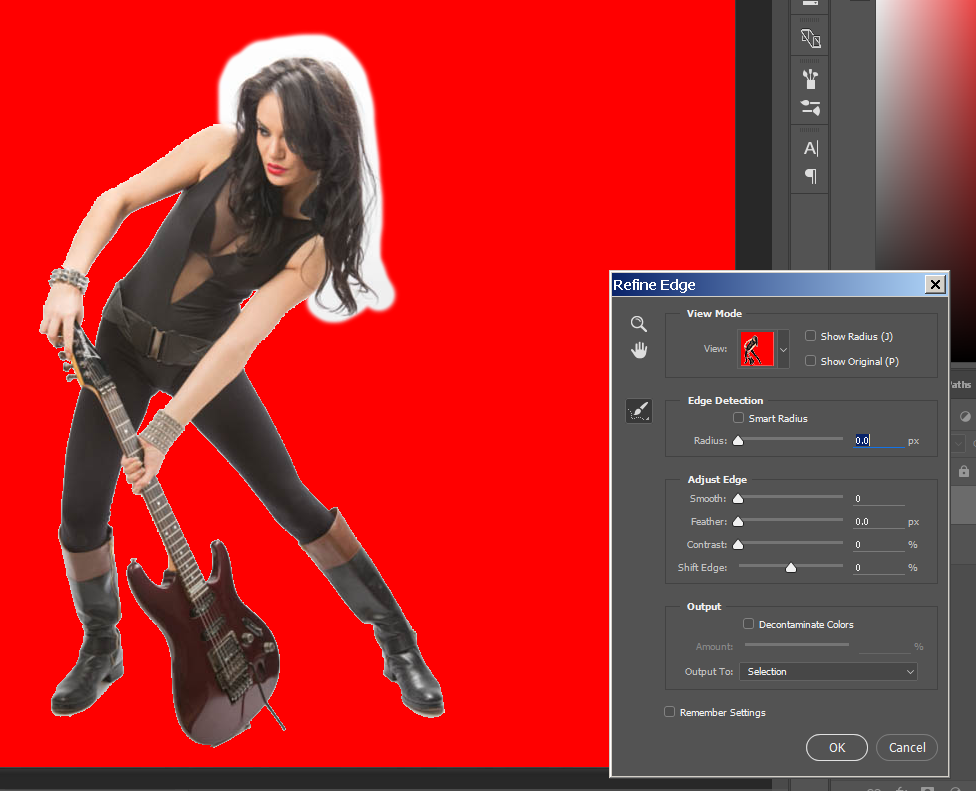 With the ant trail around your subject, invert the selection by going to Select>Inverse and then click on refine edge. whilst doing this, draw around the hair of your person. This will make it look nicer once you finalise your decision.
Place your subject into background if you have one and then resize it to your liking. In my case, none of this needs doing so I'll just leave it as it is.
Convert the layer of your a smart object, which if you've been following and reading through this blog. You should know how to do, if not, select the layer of your subject and on the layers tab, click the icon on the top right of the tab. This will give you a drop down menu in which you can choose "Convert to smart object".
After this, duplicate the layer naming the bottom one to liquify.
Step 3 -
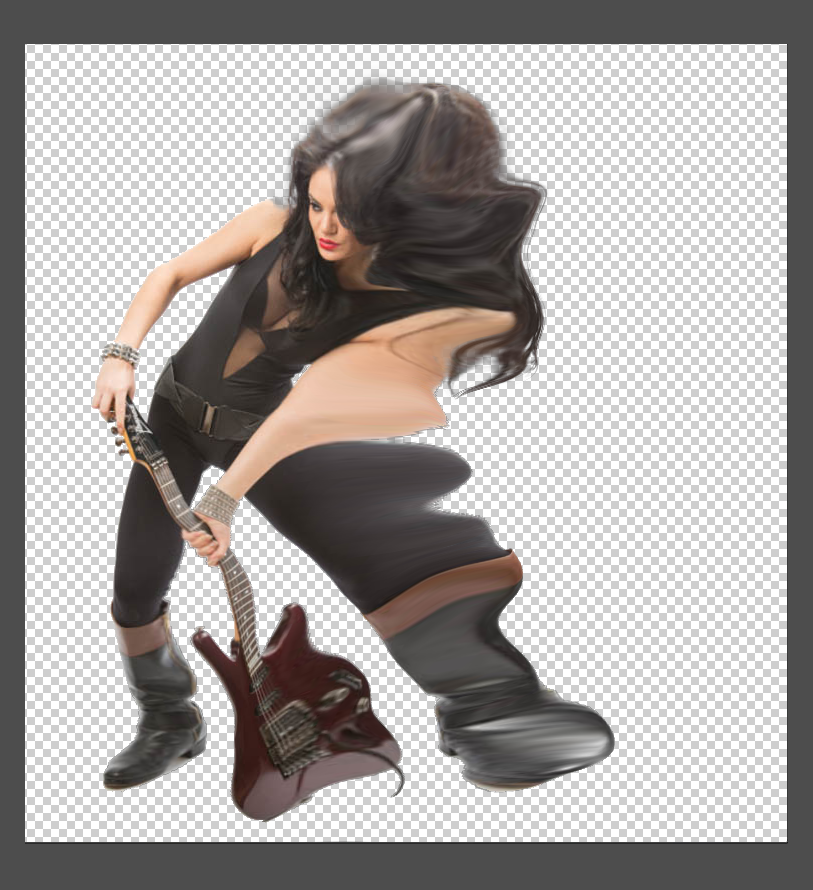 Open up liquify on the correct layer by going to Filter>Liquify, in here, we'll be using the "forward warp tool". Our goal is to drag out the edges of our subject using it to create a distorted and stretched out looking image of our original. It should look something like this.
Once this is done, add a layer mask to it by clicking on the layer mask icon at the bottom of you're layers tab, next to "fx".
Now invert this layer mask by pressing either CMD+I or CTRL+I. Now when you cover the layer mask with black, it'll cover the layer whilst adding white to the layer mask, it'll show parts of the layer you draw on.
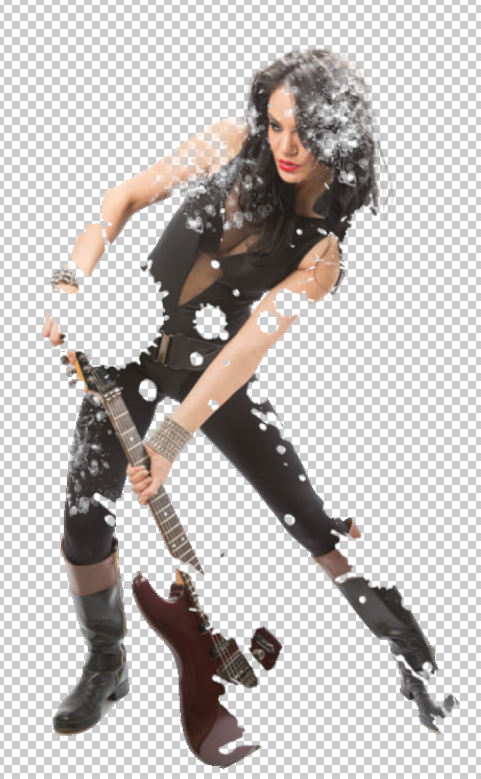 Add another layer mask to your original, un-liquified image as well.
Step 4 -
Step 4 will use custom brushes of paint splatters, the brushes I'll be using can be found at: https://db.tt/NH8Hh7hO - This link was taken from the tutorial we had to follow to creat the video.
Install the brushes in to photoshop, you should be able to just double click and open them where they will install themselves into the program. With the brushes installed, use them to start covering up your original images layer.
Now you're ready for step five which will teach you how to use our liquified layer to create a dispersion effect with our splatter brushes.
Step 5 -
Like you did on the above layer, on the liquified layer, do the same but make you're you invert the foreground and background colours. Using the splatter brushes, go over your image and you'll notice some of it comes back. Go around everywhere you stretched out when liquifying to create the splattered effect.
Final Image -
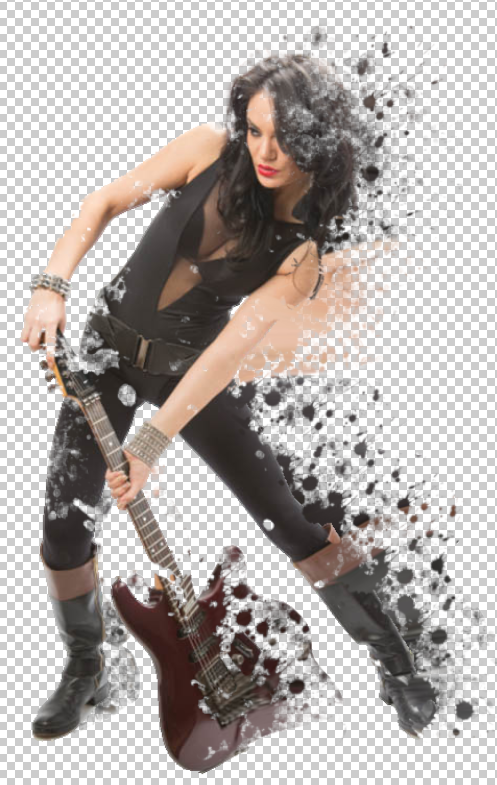
No comments:
Post a Comment