Step 1 -
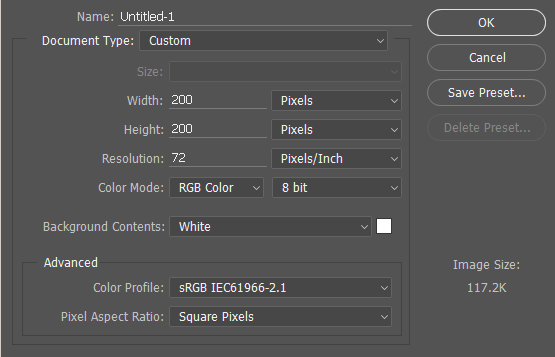
Create a new photoshop document with the following settings:
Now select the brush tool and select your foreground to black, with this done, open up your brush palette and select the "Star 70 Pixels" brush. This is the brush we'll using on our canvas soon.
Step 2 -
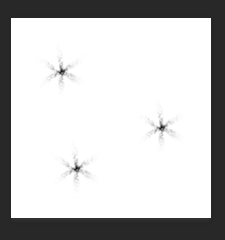
Click onto your canvas three times in different area's each time, if you'd like to, try to follow along with me as much as possible. Here is what i've done with the "Star 70 Pixels" brush.
Step 3 -
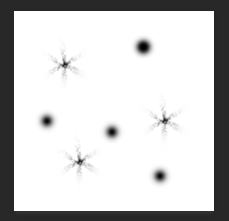
After this step we repeat it with a different brush and in four places. The brush we'll be using this time
will be the brush "Airbrush Soft Round 17", so find this in th brush palette.
What this will do is add a little variety and sparkle to your brush. Our next step will be more brush creating but this time using additional brushes hidden in the palette.
 Step 4 -
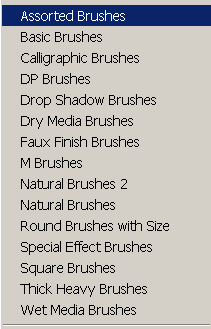
 Open your brush palette and click on the small icon to the top right, this will bring down a drop-down menu where you can select different types of brushes, the brushes we want are called "Assorted Brushes". Click on this and then click "Append", this will then add them to your palette.
From here, find the brush called "Starburst - Small", it should be 50px and this is the next brush we'll be adding to our custom own created brush.
Like we did before, place it four different times on your canvas still using the black as our foreground colour.
How this looks can be seen here:

Now your brush is done, its time to define it as a new brush preset. To do this, go to Edit>Define Brush Preset and name your brush as "Sparkle Brush".
Your brush has been made and we're ready to start using it. The image i'm going to be using it in will be one provided to us but you can open up your own and use it where you would like to.
Step 6 -
Open up your image you want to add this brush to and create a new layer for the brush to be used on. Once this is done, change your foreground colour to white and select the brush we just made in the brush palette.
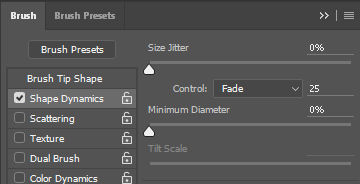
We're going to edit our brushes characteristics. First tick "Shape Dynamics" and now enter the following to what you see below.
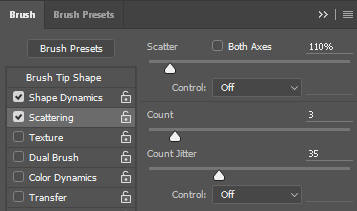
Now tick the "Scattering" option and in this tab use the following settings:
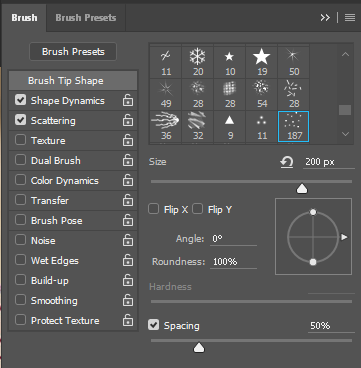
Our next step is to adjust the "Brush Tip Shape". Start by clicking on this in the menu bar to side where we found Scattering and Shape Dynamics. Once you've done this, input the following:
The brush is now complete and we're ready to start using it, what i suggest you to do is use the brush where you want but also pay attention to the size of it and in my case, I will be decreasing it over time.
Duplicate this layer for more editing, we're going to be adding a Gaussian Blur to the layer so with the newly duplicated layer head to Filter>Blur>Gaussian Blur, in this pop-up box, entera radius of 4.0 pixels.
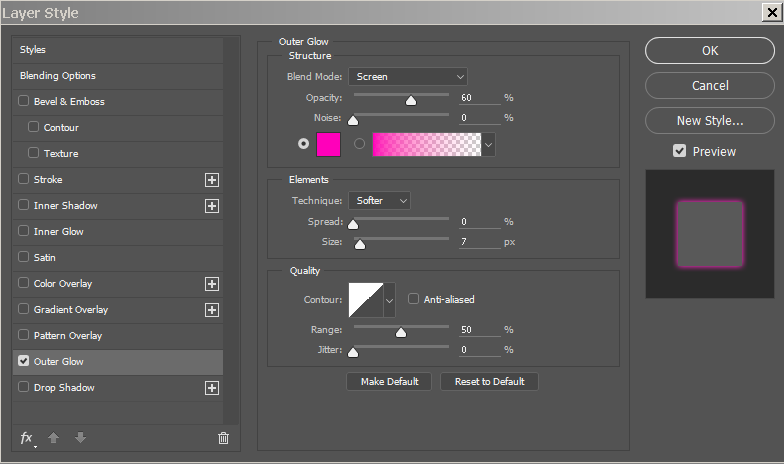
To make the sparkles we created really shine, we need to add an outer glow. Duplicate the layer you just Gaussian blurred and right click to blending options. From here, head to "Outer Glow" and input the following:
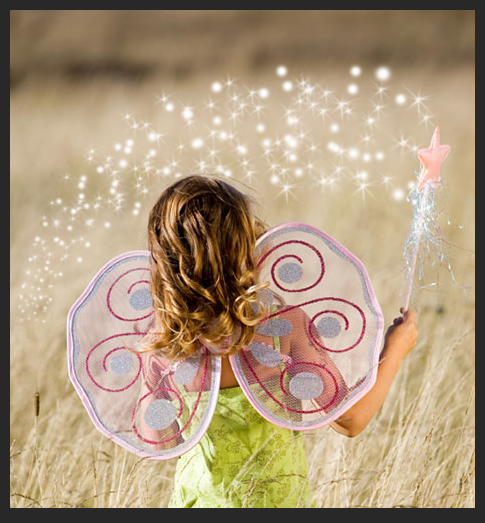
Your image is now complete. Here's a look of how mine turned out:

No comments:
Post a Comment